This is part two in a four part series on implementing a serverless, JSON based approach using AWS for data ingestion
- Architecture: What’s the approach?
- Development Process: How did I set up my environment that was effective and efficient for developing?
- Difficulties: What issues came up, and how did they get resolved?
- End results: Does this architecture achieve the goals that it set out to achieve?
One of the biggest blockers to getting started with building out the serverless data ingestion was figuring out the best way to develop code which could be deployed on the different AWS services being used. Traditionally I’ve deployed code to a central server or cluster from which everything could be tested and promoted. Deploy to a server, test on the server, then move to a production server or location on the same server where production files/code live. What happens when there is no server?
Docker
I’d put off learning Docker for quite a while due to the complexity introduced when running Docker, but in this case, being able to replicate the environment Lambda functions run on was the first time Docker clicked for me. Loosely following the excellent tutorial from Nicola Pietroluongo located here, I was able to stumble my way through creating my first dockerfile, resulting the below code which can be found here on GitHub.
FROM amazonlinux
RUN yum update -y
RUN yum install python3 -y
RUN yum install nano -y
RUN yum install zip -y
RUN yum install unzip -y

#AWS CLI Installation
#RUN curl "https://awscli.amazonaws.com/awscli-exe-linux-x86_64.zip" -o "awscliv2.zip"
#RUN unzip awscliv2.zip
#RUN ./aws/install

#create working directory
ADD . /user/src
RUN pip3 install boto3 -t /user/src/Forsta/Parser

#v1
#Pull base image
#FROM ubuntu:latest

#Installation packages
#RUN apt-get update
#RUN apt-get install -y curl
#RUN apt-get install -y unzip
#RUN apt-get install -y python3
#RUN apt-get update
#RUN apt-get install -y python3-pip
#RUN pip3 install boto3
#RUN apt-get install nano

#AWS CLI installation
#RUN curl "https://awscli.amazonaws.com/awscli-exe-linux-x86_64.zip" -o "awscliv2.zip"
#RUN unzip awscliv2.zip
#RUN ./aws/install


#Add's current directory into container home directory.
#ADD . /home
While tinkering around with different approaches to the code, I was able to add or remove dependencies from the environment as needed (as you can see with all of the commented out packages in the above). I was constantly creating and destroying the environments running two or three commands in my local command line.
When developing on EC2 or other server environments, dependency management has always been a pain and has at times resulted in a bloated environment (slower, higher maintenance costs, etc.). This is due to to the packages that are unnecessary or never used are installed in the environment because they may have been used while developing the code, found to not be the best solution, but not deleted from the server environment. Using Docker was awesome due to the fact that each time I was iterating my code, I was spinning up the environment through the Dockerfile and commenting out the dependencies that weren’t needed, preventing this issue.
Deployment
The development of the code was all done using visual studio code, and once ready for unit tests, the Dockerfile above would be run. The actual python code, along with all dependencies are all placed in the container at the directory location /user/src/Forsta/Parser, as specified in the Dockerfile. If the code resulted in the desired outcome, I then Zip the files along with dependencies.
This Zip file is what we wanted to eventually get into a Lambda function. Once this Zip file was present in the container I spun up, the file was pulled down to my local machine, then uploaded through the AWS Management Console (this could all be automated) and ready to execute since I’d already setup the correct account through IAM.

The actual code getting executed is located here, and shown below.
from tests import test_parser

def lambda_handler(event, context):
    test_parser.t_parser()
    print("Completed")
Code Repo
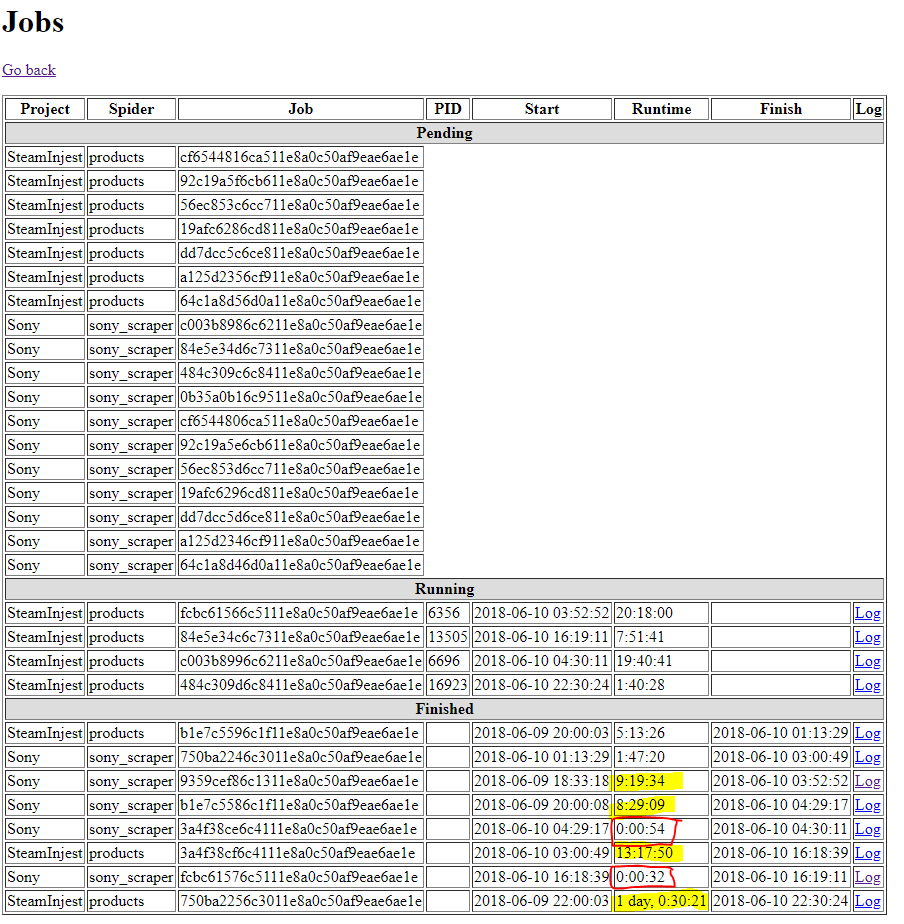
Most people are familiar with Github at this point. I used GitHub Desktop to maintain the code base entirely on the main branch. Nothing fancy here, as I was working alone on this and able to do the quickest/fastest solution. As a side note, one of the items worth mentioning is that I picked up a code repo from a few years ago to start this (as shown below). I’ve had multiple computers and storage mediums die since then, but being able to pickup the repo and see the history was super useful.
Even if the code had been stored on my local C drive, who knows if I’d have been able to find it or remember why certain things were done. Being able to go through the version history and see the files between commits, helped greatly in refreshing and picking up the code to create these pipelines.

Dynamo DB
From an AWS standpoint, nothing too special. Everything was setup manually, but this could all be automated. Just like the deployment process. I did script out the creation of the landing table as shown below and available in the repo here.
import boto3

def create_landing_table():
    dynamodb = boto3.resource('dynamodb',region_name='us-east-1')

    landing_table = dynamodb.create_table(
        TableName='landing_table',
        KeySchema=[
            {
            'AttributeName': 'uuid',
            'KeyType': 'HASH'
            },
            {
            'AttributeName': 'upload_date',
            'KeyType': 'RANGE'
            }
        ],
        AttributeDefinitions=[
            {
                'AttributeName': 'uuid',
                'AttributeType': 'S'
            },
            {
                'AttributeName': 'upload_date',
                'AttributeType': 'S'
            }
        ],
        ProvisionedThroughput={
            'ReadCapacityUnits':10,
            'WriteCapacityUnits':10
        }
    )

    print('Table Status: ',landing_table.table_status)
In the future, I’m hoping to parameterize the creation of tables as needed. Due to this being a document database, all that needs to be defined is the creation of the unique identifiers. Eventually, I’ll parameterize the creation of the sort keys as necessary for performance.
With all the above, you now have an idea of how I developed on my local machine, deployed code to Lambda, and setup my final landing table in DynamoDB. If you missed the first post in the series which provides an overview of what I was trying to build, you can find that post here.